
How to Choose the Best Cable Hider for Your Needs
Choosing the right cable hider starts with the room, not the product label. Look at where cables run: behind a desk, along a skirting board, or across a busy doorway. Measure the full route, including corners and the extra length needed to reach an outlet. A narrow cover may suit one charging cable, while a wider raceway can conceal several cords. Check the cable hider’s dimensions before buying. A tidy product that cannot close around your cables is not much help.
Material and installation matter, too. Paintable PVC can blend into a wall, while a flexible fabric sleeve may work better beneath a desk. For a rental, removable adhesive can be useful, but it may not grip dusty or textured surfaces well. Test a small area. Keep heat-producing equipment’s ventilation clear, and never force too many cables into one channel. Small details count.
A dependable recommendation should come from a named expert and a traceable source. No source article or verified expert quotation was provided here, so attributing a quote would risk misleading you. That is worth being careful about. This guide can still help you compare cable capacity, installation style, finish, and maintenance needs. The best choice is the one that fits your actual route, stays secure, and remains easy to inspect when a cable needs replacing. A neat result is useful. Safe access matters more.
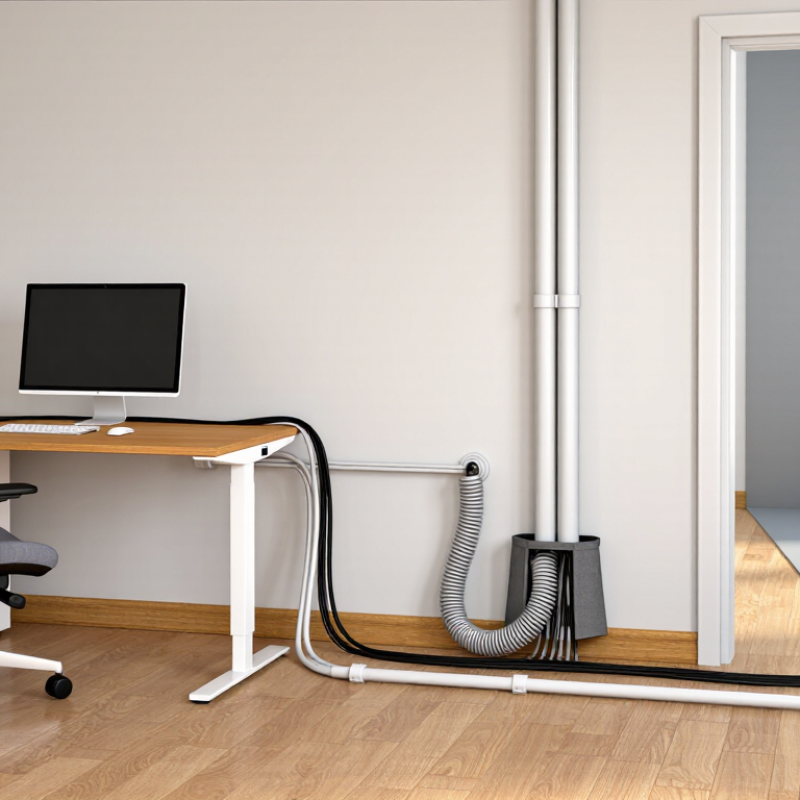
Table of Contents
[Hide]
Understanding Cable Hiders and Their Purpose
A cable hider is a channel or sleeve that gathers exposed wires and routes them along a wall, desk, or floor edge. Its purpose is practical: reduce snags, keep cables out of walking paths, and make a room easier to clean. It can also shield cables from everyday scuffs. It is not electrical insulation, and it cannot make damaged wiring safe. Small distinction. But an important one.
The National Fire Protection Association’s Home Electrical Fires report found an average of 46,700 U.S. home fires involving electrical failure or malfunction each year from 2015 to 2019. That figure does not mean cable hiders prevent fires; it highlights why damaged or overloaded wiring needs proper attention. A hider should fit the cable count without crushing wires, and it should allow reasonable access for inspection. Check the route, too: a channel beside a warm appliance may be a poor choice if it traps heat. For a desk, a slim adhesive raceway may keep a charging lead off the floor. For several cables, a wider, removable cover may be easier to maintain. I still find that tidy-looking installations can hide messy cable routes, so inspect the path before closing the cover.
How to Choose the Best Cable Hider for Your Needs - Understanding Cable Hiders and Their Purpose
| Cable hider type | Best suited for | Typical installation | Cable capacity | Advantages | Things to consider |
|---|---|---|---|---|---|
| Adhesive cable raceway | Neat runs along walls, desks, or cabinets | Attach the channel with its adhesive backing; some models can also be screwed in place | Usually suitable for a small bundle; check the channel’s internal width and height against the cables | Low-profile and easy to cut to length; many versions have a removable cover | Adhesive may not hold well on dusty, textured, or damp surfaces; removing it can affect some finishes |
| Paintable surface raceway | Visible cable runs that need to blend with a wall or trim | Mount along the surface with adhesive or fasteners, then paint if the product allows it | Varies by channel size; compare usable internal dimensions with the full cable bundle | Can create a tidy, coordinated finish and conceal longer cable routes | Painting and cutting add installation time; confirm paint compatibility and access requirements |
| Floor cord cover | Cables crossing walkways or open floor areas | Lay over the cable and secure according to the product instructions | Depends on the number and diameter of cords and the cover’s channel dimensions | Helps protect cables and reduces the chance of catching a foot on an exposed cord | Choose a cover intended for the location and expected foot traffic; keep doors and accessible routes unobstructed |
| Flexible cable sleeve | Grouping several cords behind a desk or entertainment unit | Wrap or feed cables through the sleeve; some styles use a zipper or hook-and-loop closure | Flexible capacity; select a sleeve diameter that fits the bundle without compressing it | Accommodates cables of different lengths and makes a bundle easier to manage | Does not attach cables to a wall or floor; leave room to access connectors and avoid tight bends |
| Under-desk cable tray | Power strips and cable slack beneath a workstation | Mount to the underside of a desk using the included hardware or a compatible mounting method | Capacity is determined by tray dimensions and the size of the power strip and cable bundle | Keeps cords off the floor and centralizes cable slack near the desk | Check desk material, mounting clearance, and power-strip fit; do not overload the tray |
| Baseboard cable cover | Cable routes running along the bottom of a room wall | Attach along the baseboard or wall using the product’s clips, adhesive, or fasteners | Varies by profile; check internal space and corner or connector options | Routes cables close to the floor and can be less visually prominent than a mid-wall run | Measure corners, doorways, and furniture clearances before choosing the route |
Selection tip: Measure the cable bundle and compare it with the product’s usable internal dimensions. Leave enough room to avoid pinching cables, preserve access to connectors, and follow the product’s installation and electrical-safety instructions.
Related Posts
-
Top 10 Cable Hider Solutions for a Clutter Free Home?
-
2026 Top Cable Cover Options for Your Home and Office Needs?
-

10 Cable Hider Tips for a Neater Workspace?
-
7 Cable Hider Tips for a Clean Organized Workspace
-

2026 Best Cable Ducting Solutions for Your Home and Office?
-

Revolutionize Your Workspace: Unleashing the Power of Innovative Cable Holders